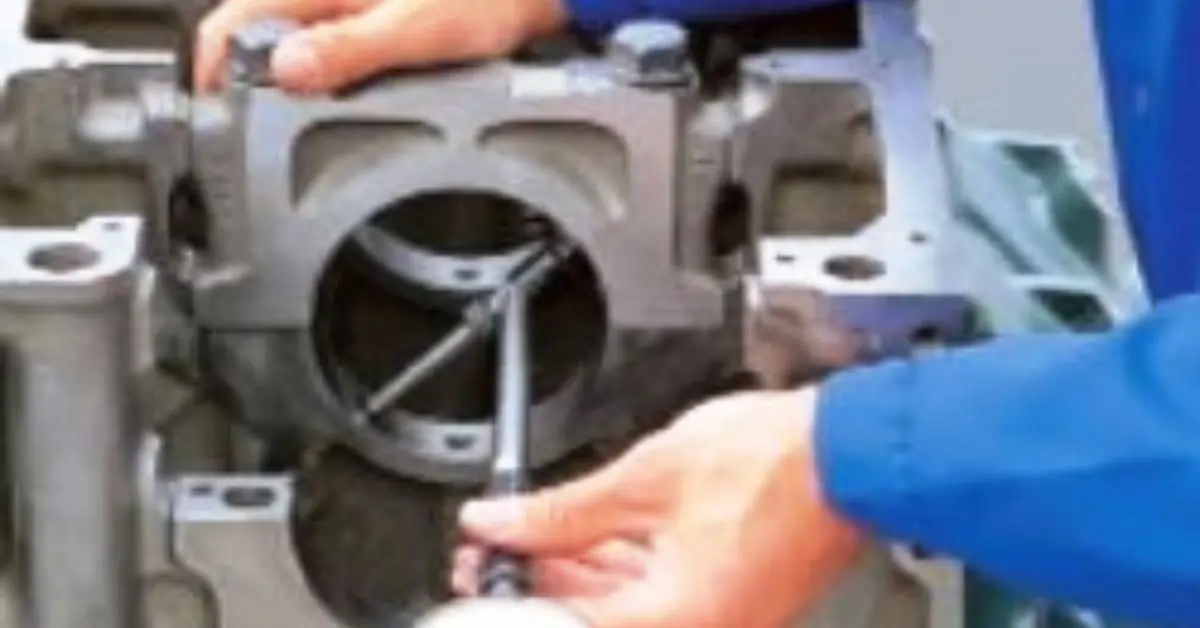
Guidelines For Bearing Installation: A Practical Handbook
The need for precise installation and reliable assessment must be balanced in journal bearings. Whether installing brand-new bearings or evaluating those that have served their time, a well-defined set of guidelines becomes indispensable.
So, we’ll mainly talk about the usual situations, but we know exceptional cases exist.
Think of this handbook as your helpful guide. It gives you clear instructions and sound advice. It’s not just a manual; it’s a decision-support tool for service technicians. Whether you’re dealing with aluminum bimetal bearings, tri-metal bearings, or Rillenlager, we’ve striven to provide comprehensive coverage for the situations you encounter most frequently.
Prepare to embark on a journey through the fundamental principles of bearing installation and replacement, guided by practical wisdom and years of industry experience. This handbook will help you, the service technician, learn essential things to ensure bearings work well.
Key Formulas for Bearing Installation
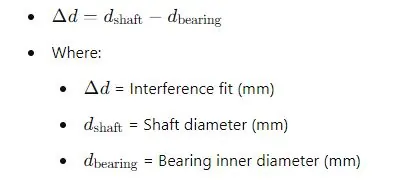
Interference Fit Calculation:
Ensuring a proper interference fit between the shaft and the bearing is crucial for a stable and secure installation. This formula calculates the difference in diameters, helping to achieve the right fit that prevents slippage and ensures long-lasting performance.
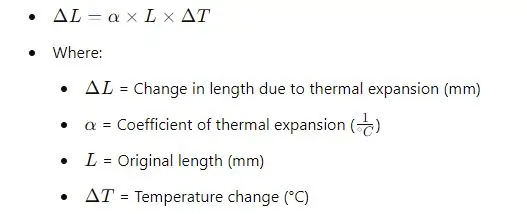
Thermal Expansion Allowance:
Bearings and shafts can expand or contract due to temperature changes during operation. This formula helps you account for thermal expansion, ensuring that the bearing maintains its fit and function under varying temperature conditions.
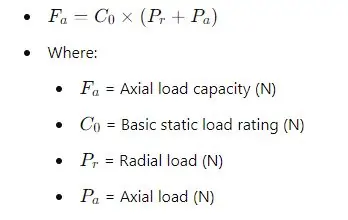
Axial Load Capacity:
Bearings must support axial loads without failing. This formula calculates the maximum axial load a bearing can handle, ensuring that it operates within safe limits and prevents premature wear or damage.
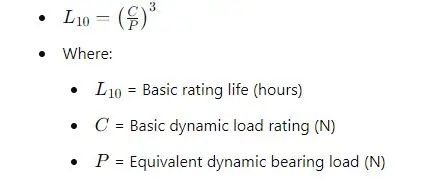
Bearing Life Calculation:
The lifespan of a bearing is influenced by the loads it carries. This formula estimates the operational life of a bearing based on the dynamic load it experiences, helping in planning maintenance and replacements.
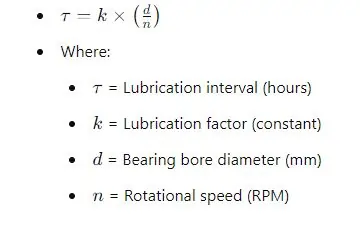
Lubrication Interval Calculation:
Proper lubrication is essential for the smooth operation of bearings. This formula determines the optimal lubrication intervals, ensuring that the bearing remains well-lubricated to minimize friction and wear, thereby extending its service life.
Bearing Installation Guidelines
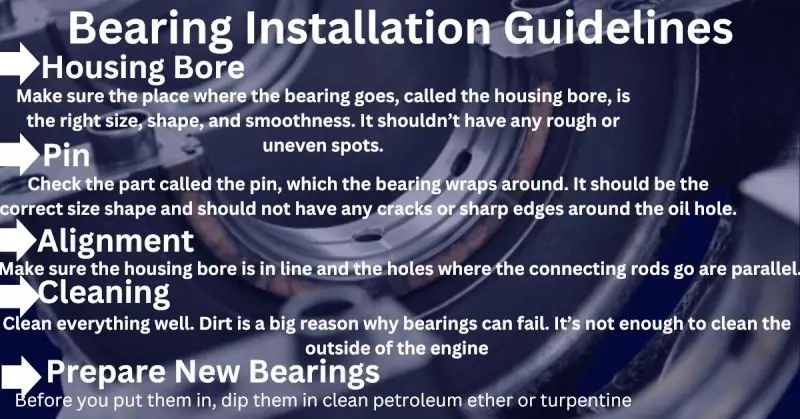
Before you install engine bearings, there are some essential things to check and prepare:
Housing Bore: Make sure the place where the bearing goes, called the housing bore, is the right size, shape, and smoothness. It shouldn’t have any rough or uneven spots.
Pin: Check the part called the pin, which the bearing wraps around. It should be the correct size shape and should not have any cracks or sharp edges around the oil hole.
Alignment: Make sure the housing bore is in line and the holes where the connecting rods go are parallel.
Cleaning: Clean everything well. Dirt is a big reason why bearings can fail. It’s not enough to clean the outside of the engine. You also need to clean all the inside parts, like the filter housing, oil pump, oil pump screen, oil pan, and the channels inside the engine block where oil flows. You can use special cleaning machines or do it carefully by hand.
Prepare New Bearings: When you get new bearings, they often have a protective layer of oil or grease. Before you put them in, dip them in clean petroleum ether or turpentine. Then, use a soft brush to remove the protective layer. Be gentle, and don’t wipe the part that touches other parts.
Remember, bearings are exact parts, so handle them carefully to ensure they work well.
Essential Tools and Instruments for Bearing Installation
| Tool/Instrument | Description |
|---|---|
| Bearing Pullers and Pushers | Used for removing and installing ball and roller bearings without causing damage to the components. |
| Hydraulic Press | Provides controlled force to install or remove larger ball and roller bearings. |
| Bearing Heaters | Used to heat ball and roller bearings evenly before installation, allowing them to expand and fit onto the shaft easily. |
| Dial Indicator | Measures the runout and alignment of the bearing and shaft to ensure precision during installation. |
| Torque Wrench | Ensures bolts and nuts are tightened to the correct torque specifications, avoiding under or over-tightening. |
| Feeler Gauges | Used to measure the clearance between the bearing and the housing or shaft, essential for both ball/roller and shell bearings. |
| Micrometer | Measures the diameter of the shaft and the bearing bore to ensure proper fit, crucial for precision in both ball/roller and shell bearings. |
| Clean, Lint-Free Cloths | Essential for cleaning all bearing surfaces, including shell, ball, and roller bearings, before installation to remove contaminants. |
| High-Quality Grease and Grease Gun | Proper lubrication is critical; a grease gun allows precise application of lubricant to ball and roller bearings. |
| Soft-Faced Hammer | Used to gently tap ball and roller bearings into place without damaging the components. |
| Alignment Tools | Ensures that ball and roller bearings are aligned correctly with the shaft and other components, preventing misalignment. |
| Safety Gear | Includes gloves, safety glasses, and protective clothing to ensure safety during all types of bearing installation. |
| Bearing Scrapers | Specifically used for shell bearings, to carefully remove material to achieve the correct fit and surface finish. |
| Plasticine or Lead Wire | Used for checking the clearance in marine diesel engine shell bearings by placing it between the bearing and journal. |
| Engine Turning Gear | Essential for rotating the crankshaft during the installation of main and conrod shell bearings in marine diesel engines. |
| Torque Multipliers | Used for achieving the high torque required for tightening bolts on large marine diesel engine shell bearings. |
| Bearing Blue (Engineer’s Blue) | Applied to shell bearings to check the contact pattern between the bearing surface and the crankshaft journal. |
| Thickness Gauges (Taper Gauges) | Used to measure the thickness of shims or the bearing shell to ensure proper installation in marine diesel engines. |
| Crankshaft Deflection Gauge | Used to measure the deflection of the crankshaft, particularly important when installing main shell bearings in marine engines. |
| Crankshaft Web Deflection Measurement Tool | Measures the deflection of crankshaft webs during the installation of main and conrod shell bearings to ensure alignment. |
Marking Engine Parts for Precision
In the world of engines, marking engine parts is like putting labels on them to ensure they fit perfectly and work without any mistakes.
These labels connect rods and caps or main bearing caps and shells. These parts have significant jobs in the engine, and if they aren’t put together just right, it can cause considerable problems like things not fitting, wearing out unevenly, or even breaking.
So, we put special marks on parts like connecting rods and caps to show they go together. These marks are like a secret code that says, “These parts are a perfect match.” Marking helps us avoid mistakes when we’re putting things back together.
We do the same thing with main bearing caps and bearing shells to keep the engine strong and working smoothly. When these parts are lined up just right, it helps reduce friction and keeps everything in good shape. So, marking them is like a small job that prevents big engine problems.
In the end, marking engine parts is a simple but essential step. It ensures everything fits perfectly and works great, whether we’re building a new engine or taking care of one already running.
Clean Engine Parts
To keep your engine running smoothly and for a long time, it’s crucial to keep its parts clean. Dirt and nasty stuff can cause problems, especially with bearings, which are essential for your engine’s health.
Whether cleaning engine parts with your hands or using machines, here’s a significant rule: Ensure everything is clean. The cleaning liquid and tools you use should be free from dirt and yucky stuff. This way, you will avoid accidentally making things worse while cleaning.
Pay extra attention to parts like the oil pump, oil screen and filter, oil pan, and oil cooler. These parts help the engine’s oil flow nicely, and if they get dirty, it can mess things up badly. Also, be careful when cleaning the passages and canals inside the engine block and crankshaft. These passages are like highways for oil, and if they’re dirty, your engine won’t work well.
In simple words, keeping engine parts clean is super important. When you clean them up, you prevent dirt from causing trouble and ruining your engine. Clean parts mean a happy, reliable engine running well for a long time.
Inspecting and Fixing Engine Parts
When we talk about inspecting and fixing engine parts, it’s like giving them a check-up to ensure they’re in great shape.
First, we use a special measuring tool to check the hole where the part fits. We want to know if it’s the right size, completely round and straight. We also look closely at the surface to see if it’s damaged.
Next, we use a different tool to measure things like the pins in the engine. We want to ensure they’re the correct size, perfectly round, and straight. We also examine the pin’s surface and the curved parts for any cracks, roughness, or problems with how hard they are.
Sometimes, we must smooth out the hole where the oil goes in the pin. We make it nice, and even so, the oil can flow properly.
Lastly, we use a special instrument to check if the connecting rod, like a link in the engine, is bent or twisted. If it’s not straight, we’ll need to fix it.
So, inspecting and fixing engine parts is like a doctor’s check-up for your engine to make sure everything is just right.
Replacing Engine Bearings: An Easy Guide
When swapping out your engine’s bearings is time, getting the right ones is crucial. Fortunately, the Manufacturer Engine Bearing Catalog is here to assist. This catalog contains all the necessary information to select the perfect replacement bearings.
The catalog also details different sizes, which is vital when choosing the suitable bearings for your engine.
To ensure you’ve made the right choice, comparing the old bearings with the new ones is a good idea. This side-by-side check guarantees you’ve selected correctly.
Once you’ve decided confidently, it’s time to get the new bearings ready for installation.
. But before that, remove the protective layer from the new bearings.
By following these steps, you’ll smoothly and successfully replace your engine’s bearings.
Bearing Installation Made Simple
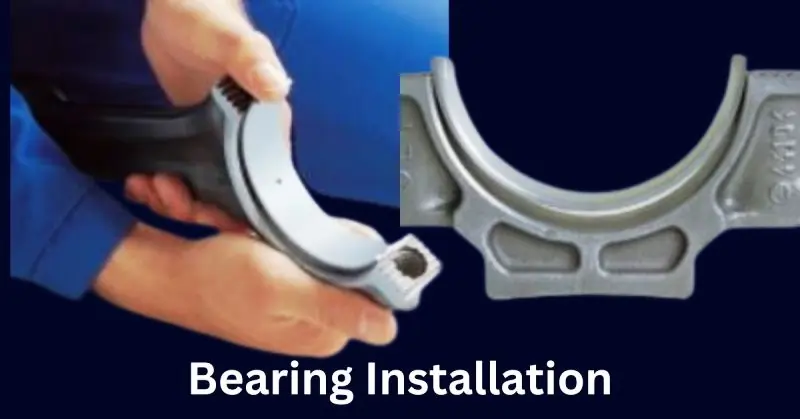
When installing bearings, some parts, like locating lugs and pins, help position the bearing correctly. They don’t add to the tight fit. If the fit between the bearing back and housing must be snug enough, these positioning parts might get bent or damaged.
Now, let’s talk about something called “free spread.” It’s the extra space the bearing shell has compared to the housing bore when you measure over the connecting surfaces. It’s not the same as “crush height” or “preload.” Free spread makes bearing installation easier by keeping the shell in place and stopping it from slipping.
But here’s an important tip: Don’t install a bearing with no negative free spread. Doing that increases the risk of the shaft touching the running surface near the connecting areas. And that’s a big problem because it can cause the bearing to fail. So, always check for the proper free spread when installing bearings to keep things running smoothly.
Bearing Clearance: What You Need to Know
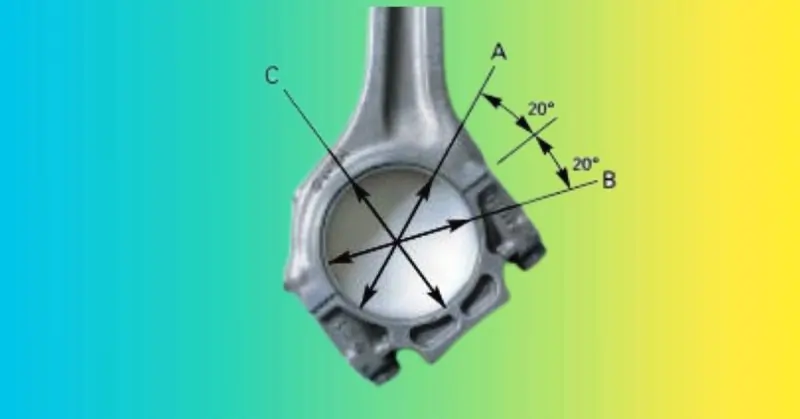
To ensure your bearing works correctly, you need to have the right amount of space inside it, called “clearance.” Your engine’s user manual has the exact numbers you should follow. It’s a good idea to check this clearance after you’ve repaired or reconditioned your engine. But here’s the thing: before you measure it, you must tighten the bolts properly.
Now, there are two main ways to measure clearance for radial bearings:
- Measure the pin’s diameter with a micrometer, and measure the bore’s diameter with a precision bore gauge after you’ve installed the bearing. Then, subtract the pin diameter from the bore diameter, and you’ll have your clearance.
- You can also use something called “Plastigage,” which is a special, soft strip. You put it between the pin and the bearing. When you tighten the bolts, it squishes the strip, and the final width of the strip shows you the clearance. You can read it from a scale on the package. But remember, this method isn’t as precise as the first one.
Besides checking clearance, you can also look at the roundness and the cap’s position:
- Roundness: Measure points A and B, find their average, and compare it to point C.
- Cap Displacement: If points A and B differ, you can figure out the cap displacement by using half of the difference.
Tightening Bolts and Checking Bearing Cap
When it comes to tightening the cap bolts, you have different options. You should check the engine manual to know which method suits your engine. Sometimes, the engine manufacturer recommends using new bolts when you put things back together. If you need more clarification, using new bolts is a good idea.
Now, how do you check if the bearing fits correctly? You can measure the gap between the cap and the housing. This gap is the difference between the bearing shell’s and bore’s sizes. You can find standard values in the engine manual or learn them from experience.
Here’s how you do it:
- First, install the bearing and tighten the bolts as the manual says.
- Then, you can open the bolts on one or both sides, depending on how you want to measure.
- Finally, measure the gap along the bearing’s back between the cap and the housing and between the cap and the conrod.
The accuracy of this method depends on keeping good contact between the bearing’s back and the housing, even when you’ve loosened the bolts on one side.
FAQ on ” Guidelines For Bearing Installation”
Q: Why is choosing the right bearing crucial?
A: Choosing the right bearing is vital for optimal engine performance.
Q: What’s the importance of comparing old and new bearings?
A: Comparing old and new bearings ensures the correct selection.
Q: Why handle bearings with care?
A: Handling bearings carefully prevents potential damage.
Q: Why mark engine parts during maintenance?
A: Marking engine parts ensures precision during reassembly.
Blog Conclusion
In summary, taking good care of your engine’s bearings is essential for a smooth, long-lasting machine. These little parts have a big job; keeping them in top shape is up to us.
Whether you’re picking suitable bearings using catalogs, checking sizes, or tightening bolts just right, every step matters.
And remember to mark engine parts and keep things clean. These simple things might seem small, but they can stop big problems from happening later.
Remember, bearings are like the engine’s delicate parts, so treat them gently. Even a tiny scratch can lead to significant issues. Always follow what the manufacturer says and look at your engine’s manual for help.
Following these guidelines for installing and caring for your bearings, your engine will run like a champ. Whether you’re a pro mechanic or love fixing stuff in your garage, it doesn’t matter – these tips will keep your engine in great shape.
So, remember what you’ve learned here next time you need to replace your engine’s bearings. Take your time, do things right, and your engine will thank you with many years of smooth and trouble-free running.
