Table of Contents
Generator Load Test Checklist
Generator Load Test Checklist: Ensuring Your Generator is Ready When You Need It
Think about having a backup generator at your home or business. It’s like having a superhero on standby, all set to rescue you when the electricity suddenly disappears. However, there’s a twist: superheroes require regular practice to stay strong and capable. That’s where the Generator Load Test Checklist comes in.
What is a Generator Load Test?
A Generator Load Test is like a fitness routine for your generator. Like you go for a jog or hit the gym to stay healthy, your generator needs a workout, too. But instead of dumbbells and treadmills, it lifts a heavy load to ensure it’s strong enough to power your home or business during an outage.
Why is Load Testing Important?
Load testing is crucial because it tells you if your generator can handle the job when the lights go out. It’s like checking if your superhero can lift a car when a disaster strikes. With load testing, your generator might be up to the task, and that’s a problem you want to avoid discovering in the middle of a blackout.
The Generator Load Test Checklist
- Verify the proper installation of the following components:
- Engine generator Control panel
- Turning the gear starter panel
- The control panel of all auxiliary equipment
- MV SWGR (Medium Voltage Switchgear)
- NGR Panel (Neutral Grounding Resistor Panel)
- LV SWGR (Low Voltage Switchgear)
- MCC (Motor Control Center)
- DC Battery & Charger
- Black Start DG (Diesel Generator)
- Ensure all cables are tagged according to their numbers on the cable list and adequately secured with clamps, terminations, and tightened cable glands.
- Examine the cleanliness of the interior of the control panel. Make sure it’s free from dirt and debris.
- Check that the grounding connection is established using the correct size of an earthing cable, ensuring clean metal-to-metal contact and secure fastening to the accurate earthling grid.
- Confirm that there is sufficient space allocated for service and maintenance tasks. Adequate space is essential for technicians to work effectively.
- Verify that the installation maintains the control panel’s IP (Ingress Protection) classification, ensuring that all openings are properly sealed to protect against dust and moisture.
- Inspect the installation of power and control cables between all panels per the cable interconnection diagram.
- Check if the installation of field instruments such as pressure indicators (PI), pressure transmitters (PT), temperature indicators (TI), and temperature transmitters (TT) on pipelines and tanks is completed.
- Ensure the Input/Output (I/O) test for all instruments and control panels has been successfully conducted.
- To assess their electrical integrity, perform the insulation resistance test (Mega-Test) for all equipment.
- Confirm that electric supplies are connected and ready for use, like ensuring your home appliances are plugged in and working.
- Conduct the power frequency withstand voltage test for all MV (Medium Voltage) power cables to ensure they can handle the required voltage.
- Consider running Diesel Engines with a load ranging from 0 to 100% for load testing, similar to checking how a car performs under different driving conditions.
- Examine the rotation of all motors and pumps to ensure they turn in the correct direction, just like checking if your ceiling fan spins correctly.
Alternator


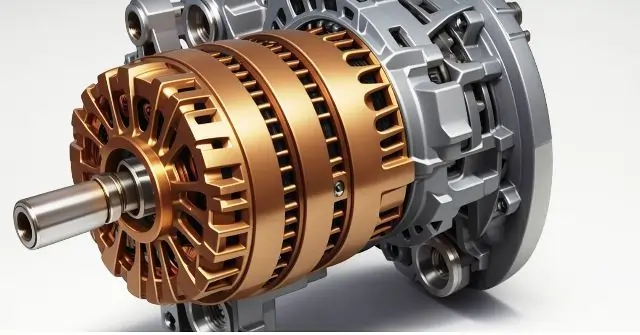
Check the alternator, as the manufacturer suggests. Use a strobe light to look at the spinning parts while it’s running. Ensure no loose parts are inside, like metal pieces, and check that all the bolts are securely fastened.
Windings


Windings are like the hidden parts inside a generator. Inspect the insulation on the generator’s hidden parts regularly and keep it dry and clean. It’s like checking your umbrella to ensure it’s not wet or dirty. It’s also a good practice to run the generator with some work (like powering things) at least once a month. This helps make sure everything inside is functioning correctly. If the air is humid (moist), it’s a good idea to run the generator more frequently, like using your umbrella on a rainy day. If not, you can use heat lamps or devices to dry the windings.
To clean them, use compressed air or cleaning liquids, but be careful and wear safety gear like glasses and a mask. Cleaning stuff can be harmful, so be cautious and follow safety guidelines. After cleaning, let the parts dry and put a special insulating coating on them to keep them safe.
Insulation Testing
Insulation Check. Use a special meter to occasionally check the generator’s wires’ insulation. This helps us know if the wires are in good shape or have problems like moisture, dirt, or damage. It’s like checking the roof of your house for leaks. Test it right after the generator stops running, and the wires remain warm and dry.
Collector Rings and Brushes


Collector Rings and Brushes. Check for sparks; the brushes and collector rings aren’t working well together. Ensure the brushes are correctly aligned on the rings and don’t stick out. Keep the rings, brushes, and holders clean and free from dirt, oil, and carbon. Please make sure the brushes move quickly in their holders. If a brush is stuck, gently rub its sides with sandpaper. Clean the holders and rings thoroughly, and tighten any loose parts. Check that the springs holding the brushes are just right.
If the rings have black spots, gently polish them with sandpaper and a special cloth. It’s okay if there are light spots after polishing. If the rings get rough, polish them while the generator runs slowly. Use a tool to check if the rings are perfectly round, and if they’re not, grind and polish them. Sometimes, change the direction of the rings.
Mechanical Checks Checklist
- Check Valve Clearance in a cold engine, which is like ensuring the gaps between the engine’s valves and other parts are just right.
- Examine the crankshaft deflection, like checking if a car’s axle is straight.
- Re-tighten the connecting rod bolts to a specific torque, ensuring they are securely fastened.
- For priming the oil system:
a) Ensure lubricating oil flows from connecting rod bushes, camshaft bearings, roller guides, and the intermediate gear section.
b) Check the oil level in the mechanical governor.
c) Verify the oil level and pressure in the turbocharger. - Fill the cooling water and ensure no leaks in the cylinder liners, especially around the rubber rings and various cooling water pipes.
- Prime the fuel system, like getting a car’s fuel system ready to run.
- Check the fuel pumps according to the test sheet. They should always be able to stop when needed.
- Inspect the clearance in the guide bearing by moving the crankshaft to one side.
- Flush the starting airline by opening the connection to the starting valve.
- Confirm that the start and stop functions are installed correctly per the instructions.
- Adjust the speed droop of the governor to 60, as it’s set from the factory.
- Open the indicator valves and let the engine run for at least two revolutions using starting air.
- Close the indicator valves.
- Set the load limit at the governor to 10, just like controlling the speed of a car.
- Start the engine and run it for 5 minutes.
- Check the pressure difference on the lube oil gauge before and after the filters. The difference shouldn’t exceed 1.5 bar when the engine is cold.
- Verify the lubrication at the rocker’s arms and check all fuel oil pipes for leaks, similar to checking for oil leaks in a car engine.
- Stop the engine after running for 5 minutes by simulating a low lube oil pressure shutdown.
- Open the crankcase doors after 5 minutes of stopping. Check the bearings and restart the engine. Continue running it for 15 minutes if everything is normal.
- Stop the engine after 15 minutes and check the temperatures of the bearings.
- Ensure all the safety stopping and warning devices are working correctly.
- Rerun the engine and test the overspeed trip, which should stop the engine if it exceeds 115% of the nominal speed.
- Restart the engine and gradually load it from 25% to 110% within 4 hours, monitoring and recording engine and electrical parameters to match test bed data. It’s like gradually increasing the speed of a car during a test drive.
Blog Post Conclusion
In our journey through the Generator Load Test Checklist, we’ve uncovered the vital steps to ensure power success when it matters most. Imagine this checklist as your trusty roadmap, guiding you through the twists and turns of generator maintenance, all to guarantee that your backup power source is ready to shine.
Regular Workouts for Your Generator
Remember, like your body needs exercise to stay fit, your generator requires regular load tests to flex its muscles. You ensure it’s always prepared to take the stage during an unexpected power outage by putting it to the test.
Fueling Up for the Long Haul
Checking your generator’s fuel levels is akin to ensuring your car has enough gas for a cross-country trip. With fuel, both your generator and your car will get very far.
Auto Mode: Your Generator’s Autopilot
Switching your generator to “Auto” mode is like setting your car on cruise control. It’s all about convenience. Your generator becomes a self-starter, ready to kick in when the lights go out, just like a car that starts on its own with a push of a button.
Keeping the Circuit On
Checking that the circuit breaker is closed is like ensuring the power switch in your home is flipped to the “on” position. With it, electricity flows, just like your lights will turn on if you have flipped the switch.
Fluid Leaks: A No-Go
Inspecting your generator for fluid leaks is as crucial as checking your car’s engine for oil or coolant leaks. Leaks can indicate a problem, like spotting a puddle under your vehicle.
FAQ on ” Generator Load Test Checklist”
Q1: What is a Generator Load Test Checklist?
A1: It’s a set of steps to ensure your backup generator is ready to provide power when needed.
Q2: How often should I perform a load test?
A2: It’s recommended to do it annually to keep your generator in top shape.
Q3: Why check fuel levels in the checklist?
A3: Ensuring adequate fuel levels guarantees your generator can run for an extended outage.
Q4: What’s the benefit of “Auto” mode?
A4: “Auto” mode makes your generator start automatically during power outages without manual intervention.
