You’re in the right place if you want your marine engine to purr like a contented cat. Marine engine maintenance Tips aren’t just a good idea; it’s your engine’s best buddy.
You see, just like we need regular check-ups with the doc, your boat’s engine craves some TLC, too. It’s all about keeping that beast running like a champ. So, let’s dive into the deep waters of marine engine maintenance!
Picture this: you’re cruising along, the wind in your hair, and the sun kissing your skin. It’s the stuff dreams are made of. Well, those dreams stay alive when your engine is in tip-top shape.
Here’s the lowdown: maintaining a marine diesel engine isn’t rocket science, but it’s not child’s play. You’ve got to follow specific intervals based on hours on the water and the calendar.
No worries! We’ve got you covered with the seven best steps straight from our diesel gurus. These tips will ensure your marine engine purrs, roars, or does whatever it does flawlessly.
So, let’s roll up our sleeves and revive your engine like a rockstar! 🌊🔧
Table of Contents
Diesel Engine Maintenance Tips – Unraveling the Engine’s Clock
Picture this: You’re out on the water, waves beneath you, and the salty breeze in your hair. Your boat’s engine, the heart of your aquatic adventure, is pounding away like a champ. But, just like any superhero, even your marine engine needs a maintenance schedule.
Deciphering the Engine’s Clues
Unlike your car, which flashes a friendly “time for service” light, marine engine maintenance can be like interpreting a secret code. There is no dashboard sticker and no blinking reminders. It’s like having a pet that doesn’t meow when hungry!
The Schedule Crafters
Thankfully, engine manufacturers and maintenance gurus have got your back. They’ve crafted a marine diesel engine maintenance schedule, a roadmap to engine happiness. This schedule covers a vast range, starting from a robust 3,000 running hours and stretching beyond 120,000 hours.
Breaking it Down
Let’s say your marine engine has just crossed the 3,000-hour milestone. In marine terms, that’s like reaching a significant checkpoint. Your marine engine maintenance schedule says, “Hey, it’s time for a check-up.” It’s as simple as that.
So, please think of this schedule as your engine’s diary, reminding you when to pencil in those crucial maintenance dates. Now, let’s dive deeper and explore these essential intervals to keep your marine engine roaring! 📆🚤💨
Marine Engine Maintenance Tips
Tips for Maintaining Your Diesel Engine – Consider Time Between Scheduled Maintenance
Dear Marine Engineers, let us discuss the activities undertaken during the specified Overhauls. Besides the regular maintenance based on hours of operation, there are some time-based checks you can’t afford to skip. These maintenance tasks must be tackled at specific intervals, regardless of how long your trusty vessel has been on the water.
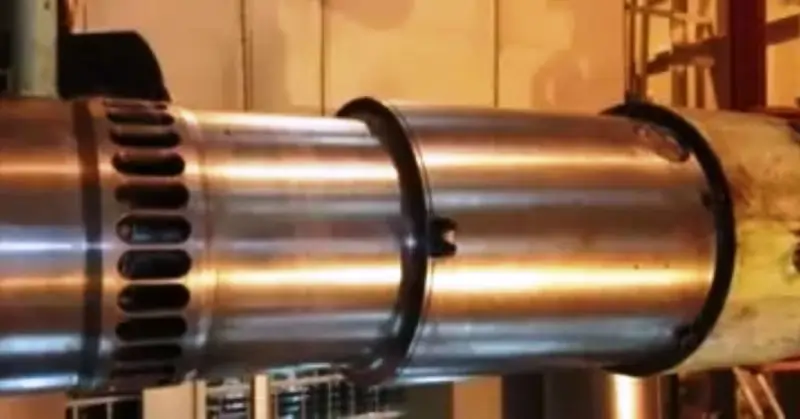
Cylinder Liner


- Begin by disassembling all cylinder liners.
- Perform honing on the cylinder liners.
- Record measurements for documentation.
Piston and Piston Ring
- Withdraw all pistons for inspection and overhaul.
- Conduct de-carbonization of pistons.
- Clean and inspect all piston and oil scraper ring grooves, checking for wear using a testing mandrel to determine acceptable tolerances.
- Replace all pistons and scraper rings before reinstalling the pistons.
- During piston installation, ensure piston ring positions are offset 180 degrees from the ring joint, and the spring joint of the scraper ring is also fitted 180 degrees offset to the ring joint.
- Open and clean all plugs, applying new Loctite 2701 adhesive after cleaning the holes and plugs with Loctite 7063. Tighten plugs to 100Nm torque.
- Arrange for an ultrasonic test of piston pins by an external agency.
- Replace retaining rings for all pistons.
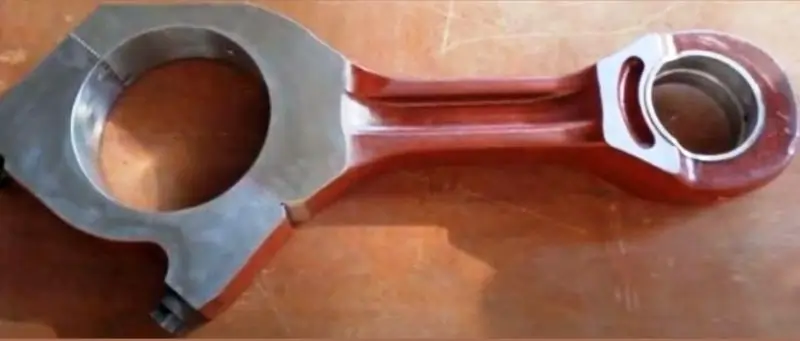
Connecting Rod


- Inspect and measure the big-end bore diameter (readings enclosed).
- Inspect small end bearings, check the clearance between the piston pin and bush, and document readings.
- Visually inspect all connecting rod bolts and nuts for any abnormalities.
- Check the tightness of all machining hole blank screws.
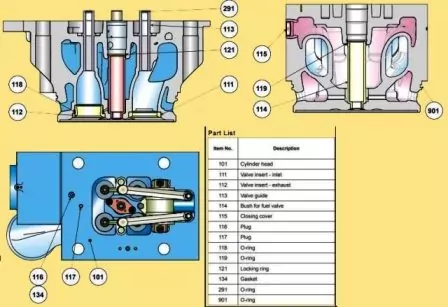
Cylinder Heads


- Remove and clean all cylinder heads.
- Inspect all inlet and exhaust valve spindles and machines or replace them.
- Verify the rotation of valve rotators before stopping the engine and replace the defective Robocop or repair with replacement springs, balls, and pressure plates based on their condition.
- Overhaul all safety valves and check and adjust the opening pressure to 175 bars.
- Inspect indicator valves.
- Inspect valve seats and replace or machine them as required.
- Perform pressure testing on all cylinder heads.
- Remove, clean, inspect, and reinstall all water guide jackets with new O rings.
- Inspect and replace the nipples.
- Tighten cylinder head nuts to the prescribed torque.
Camshaft and Camshaft Bearings
- Inspect all gear wheels, bolts, and connections for abnormalities per work card no. 507-01.00.
- Measure and record bearing clearances.
- Check the condition of the cams.
- Verify lubrication of the camshaft, ensuring lube oil flows properly from all bearings and spray pipe nozzles, with the oil jet hitting the gearwheel meshing point.
- Check the tightness of all screws, nuts, bolts, and locking devices.
- Inspect all pushrods.
- Adjust inlet clearance to 0.4mm and exhaust valve clearance to 0.9mm.
Operating Gear for Inlet Valves, Exhaust Valves, and Fuel Injection Pumps
Inspect the following:
- Roller Guide for Valve Gear a) Check for marks or scores due to seizure. b) Inspect spherical stud for deformation. c) Examine roller surfaces for marks or deformation. d) Ensure free play between rollers, bush, and pin.
- Valve Gear-Valve Bridge Springs and Push Rods Inspect all valve bridge springs, rocker arm brackets, and push rods for abnormalities.
- Roller Guide for Fuel Injection Pumps a) Inspect roller guides for marks or scores due to seizure and ensure they are in good condition. b) Check roller surfaces for marks and deformation. c) Ensure free play between rollers, bush, and pin.
- Check the lubrication of all operating gears.
Governor
- Check the governor’s drive.
- Change the governor’s oil after thoroughly flushing the governor.
- Inspect linkages and the tightness of foundation bolts.
- Arrange for the governor to be overhauled by an external agency.
Crankshaft and Main Bearings
- Inspect all crankpins.
- Check main bearing alignment (autologous), measure crankshaft deflection, and realign as necessary (readings to be included).
- Replace all main bearing shells, including the guide bearing.
- Re-tighten the counterweight to the prescribed torque of 300 Nm.
- Re-tighten main and guide bearing cap bolts to the prescribed torque of 900 bars.
- Clean crank pins thoroughly and check for any abnormal scoring marks.
Turbochargers
- Remove both cartridges.
- Remove the nozzle rings.
- Change the nozzle rings.
- Completely disassemble the TC cartridge to replace bushes and labyrinth seals.
- Assemble the cartridges.
- Check clearances and enclose measured clearances.
- Clean the CAC and conduct a pressure test.
- Clean and replace the oil in the air intake filter room inertia louvers.
Engine Frame and Bed Plate
- Re-tighten holding down bolts.
- Re-tighten bolts between the engine and base frame.
- Overhaul safety covers.
- Replace ‘O’ rings for all camshaft inspection doors and CC doors.
- Re-tighten and measure the height of all conical (AVM) bolts.
Fuel Oil System and Injection System
- Check fuel injection valves and adjust opening pressure or change nozzles. Inspect and change thrust spindles and springs.
- Replace ‘O’ rings for all fuel valves.
- Check all fuel high-pressure pipes and replace ‘O’ rings.
- Check the nominal height of all FIPs and enclose readings.
- Overhaul the nozzle cooling pump, including seal and bearing replacement, coupling replacement, and motor overhaul.
Lube Oil System
- Remove the engine-driven lube oil pump for inspection and replace bushes.
- Replace all lube oil filters.
- Clean the LOC.
- Clean the centrifugal filter and change the PRV kit (Centrifugal Filter).
- Overhaul the pre-lube oil pump, including motor overhaul, pump seal, and coupling replacement.
Cooling Water System
- Remove and overhaul the LT water pump.
- Clean the PHE.
- Check thermostatic elements for 820°C stamping and replace them if required.
- Remove, inspect, and change the ‘O’ ring of the LT water thermostat.
- Replace all cooling water nipples in the exhaust manifold if needed.
Exhaust System
Remove and clean the complete exhaust manifold and change the intermediate pieces if eroded due to cold corrosion.
Compressed Air System
- Overhaul the air starting motor and change the O/h kit.
- Overhaul the main air starting valve and replace the kit.
- Overhaul and replace the PRV kit.
Conclusion – Ensuring Smooth Sailing
Ahoy there, fellow sea lovers! We’ve explored a lot about keeping your marine engine in shipshape condition, and it’s time to wrap it all up with a nice, easy-to-understand summary.
Stay on Course with Regular Maintenance
Imagine your marine engine as your trusty first mate. If you treat it well, it’ll steer you through the open waters without a hitch. Regular maintenance might seem like a chore, but consider it your secret weapon for a trouble-free journey. Remember, taking small steps now can save you from big problems later.
Clock Hours vs. Time Intervals
We’ve discussed how to look after your engine based on the hours you use it and certain time intervals. It’s like watching your car’s mileage and changing the oil when needed. You would only drive your vehicle for a short distance if you gave it an oil change, right? The same goes for your marine engine.
The Benefit of Expert Help
Sometimes, it’s wise to let the pros handle things. Experts can catch problems you might miss and keep your engine running smoothly. It’s like having a seasoned captain navigate your ship through tricky waters.
Your Engine, Your Adventure
It’s all about the amazing adventures you’ll have out at sea. A well-maintained engine means fewer breakdowns, less time stuck in the dock, and more time enjoying beautiful sunsets and the salty sea breeze. So, remember these tips, and may your marine engine always run as smoothly as a happy cat’s purr. Here’s to calm and enjoyable sailing, my friends! ⚓🌊🚤
FAQ on ” Marine Engine Maintenance Tips”
Q1: How often should I perform marine engine maintenance?
A1: Regular maintenance is crucial, based on both hours of operation and specific time intervals.
Q2: Can I maintain my marine engine myself?
A2: Yes, but it’s often best to involve professionals for expert care.
Q3: What happens if I skip maintenance?
A3: Skipping maintenance can lead to breakdowns and costly repairs.
Q4: Why is regular maintenance important?
A4: It ensures your engine runs smoothly, reducing downtime for more enjoyable sea adventures
